Get to know your Companion
In this guide, we will go over each piece of your Companion Survival System, and go over a few tips along the way. Your Companion is designed to meet the basic survival needs of two people for seventy-two hours or more. To do that, you need to know what’s inside and how to use it. Along with getting to know your new survival equipment, this is also a chance to learn how to re-pack your gear. So, let’s dive in.

Note: We recommend sitting at a table so you can go through each pouch, one at a time. First, we will go over the bag itself.
Outside of the bag
The first thing we will look at is the backpack straps, which can be stowed inside a pocket on the outside of the bag. To deploy the straps, use the connection points at the bottom of the bag. A simple quick-release buckle is at the base of each strap, making for unclipping and re-clipping the straps a breeze.

The zipper section on the pack’s front side is a perfect place for you to stash away any documents or local maps of your area. The included survival bandana will also either be included there or in the side water bottle pocket. Take a moment to go over it, as the information printed on the bandana might be able to assist you when your Companion is called into action.

As you zip up the front pocket, notice the zipper pull is a small emergency whistle. Both zipper pulls have whistles attached and there is also a whistle on the clip of the chest strap, so you don’t have to take off the pack to use it. Whistles can be very loud, between 104 to 116 decibels, so we don’t recommend trying this in the house if others are inside (unless you want them to see the cool stuff in your new pack; we wouldn't blame you).
Survival Tip: As loud as whistles are, the sound can travel for up to a mile depending on your geography and time of day. You may be able to yell at around 85 decibels but your voice doesn’t carry very well outside, making a whistle an important tool when trying to signal for help. In the survival bandana, we go over how to signal for help with a whistle.
The bag is made of 1200D microhex PVC. So, it is fire-resistant and will not catch on fire - if left on an open flame, though, things will get toasty - fast. It has a dual, durable water repellent (DWR) coating, along with seam sealed edges and grooves. Meaning there are two layers of waterproofing and reinforcing tape to keep your contents dry no matter how hard it’s raining.

Inside the Bag
On the top of the bag, the handle is made with two straps that connect with Velcro ®. To open the bag, you will need to peel apart the two pieces. Once complete, lay the bag on its side and unzip the bag - somewhat akin to a book. Each compartment is coded by color, graphics and text. In emergency situations, when stress levels are elevated, we wanted you to be able to identify and deploy your gear with confidence. All the while, to easily be able to put it back, and preserve as much space as possible.

The internal pouches have a Velcro ® backing that connects them to the bag. This keeps the pouches from moving around, and empowers you with the quick access you may need. Additionally, it allows for custom weight distribution if gear needs to be reoriented.

Pro Tip: When packing a bag, you need to keep the heaviest items close to your body and near your shoulder blades - i.e. where “Water + Food” is, and the lightest items away from you and at the top, where the Warmth + Shelter bag is. This helps to maintain your center of gravity, providing greater balance and agility when carrying the bag.
“Warmth + Shelter’
Take out the contents and lay them on your table. Try on the gloves; they may stick together because of the waterproof coating they have. We did our best to make them one-size-fits-all, and there may be some extra space. Our first goal with these gloves was to keep your hands warm and dry. The second was durability to help keep your hands from getting cuts and scrapes that could get infected.

The raincoat, blankets, and Mylar tent are folded to take up minimal space and individually wrapped. You can take them out of their bag and feel the material, but we wouldn’t recommend unfolding them. If you do, be careful to do so slowly, so you can remember how to fold them back. They are folded to ensure no pressure points of improper folding which stresses the material.
Pro Tip: The mylar blankets and tent can be used for more than just as a blanket and tent. They can also be used to repair a broken window or provide insulation. If your car runs out of gas, leaving you stranded, your vehicle can act as your shelter. But if you have a broken window, letting the cold air or rain in, repairing your shelter is a top priority. Instead of using the blanket on yourself, use the knife and duct tape to cut just what you need to cover the window. This will provide a layer of insulation, keeping your body heat in the car.
The hand/body warmers are one-time use. They just need to be opened and exposed to air and start working.
Pro Tip: In an extreme cold-weather survival situation, do not try and warm up your hands and feet. You need to focus on keeping your core body temperature warm. Place the bags on the outside of your undershirt to keep the bag from touching your skin for too long. Place them in your armpits, your chest, or neck. If you keep your core temperature up, this will help keep your vital organs functioning. If your core temperature goes down, it stops sending blood to your arms and legs first to keep you alive. Be sure to cover your head because a lot of heat is lost from the top of your head.
“Tools + Nav”
There are two types of tape included in the tools section, duct tape, and reflective tape. The duct tape can be used to construct or repair a shelter and many other things. The reflective tape will increase an object’s visibility, making it easier to find or make yourself more visible. The paracord is also designed to be highly visible.

The Ferro Rod is a small black rod made of Magnesium that produces very hot sparks when you scrape them with the back of the knife or something similar. This will give off sparks that will light tinder, like cotton, crushed up leaves, or wood scrapings. Be careful when using the knife and ferro rod together.

Pro Tip: Of all the items in the kit, this will probably take the most practice to get good at. The time is worth it to learn and to keep up with the skill. Hold the rod in your non-dominant hand, pointing at where you want the sparks to go, and with your dominant hand, use the back of the knife to quickly scrape down the length of the rod, scrapping the metal off. The first few scraps will take the coating off, and you will see the metallic color start to get exposed. You need to roll your wrist a little as you scrape down. The trick is to scrape off as much as you can.
The Knife is full tang, meaning the metal in the knife goes all through the handle increasing its durability. The knife does not have serrations to make it easier to sharpen. The multi-tool has many functions, and it’s worth opening it and getting to know.

“Sight + Air”
The reflective goggles and masks should be taken out and tried on. The mask is excellent to protect from allergies and many other small particles. The valve helps make it easier when you’re breathing out, but it also means it isn’t suitable to wear if you have a flu virus. The adjustable goggles help to protect your eyes in the sun or rain.
Pro Tip: Wearing the mask in cold weather environments will help keep you warm. As you breathe out, some of the warm air will stay in the mask and mix with the cold air as you breathe in. It will make a small difference when every little bit helps.
“Light + Comms”
The light pouch contains two types of flashlights. The hand flashlight is a USB rechargeable flashlight that is waterproof and has an adjustable head to create a focused or board beam. There is a small piece of plastic in the battery compartment that will keep the batteries from going bad that will need to be removed before the flashlight will work. The other flashlight is a hands-free headlamp that uses batteries.
The two chem lights will give lights for a few hours and can take the place of candles. We don’t recommend activating the chem lights as they are single-use. However, chem lights are not expensive, and you can get some more to practice with. To activate the chem lights, remove them from the package, bend them in the middle until you hear a crack, and then shake them a little because it’s fun. Then it will glow very brightly, then dim slowly over a few hours.

The hand crank radio also has a flashlight and USB charging port that can charge a phone, although it won’t be as fast as charging it from a wall charger. The radio has access to the weather band radio stations, AM and FM radio stations. You can also put some batteries as a backup to the internal rechargeable batteries. There is also an SOS switch on the bottom of the radio that will make a loud siren noise.

Pro Tip: Cut an arm’s length of the paracord chem lights and spin it in quickly in a circle. This creates a large circle of bright light that can be seen for miles. This can help rescue personnel to find you or to use it as a signal.
The all-weather matches are in a waterproof container that will keep the matches from getting damaged. The matches will burn for around 30 seconds, even when wet, and if blown out, will reignite.

“First Aid”
The First Aid kit is filled with 100 plus items. Open the First Aid kit and get familiar with what’s inside. Most of the items are to help stop bleeding, but it also includes safety scissors, tweezers, and a First Aid guide. We recommend adding some tampons or feminine hygiene pads for the intended use and as a backup for wound care.

Included in the First Aid pouch are four large Body Wipes. Hygiene is essential to reduce infections. It may seem like a luxury, and while necessary for morale, it is very important to overall health.
“Water + Food”
The water sachets are packaged to make it easier to ration the water. The companion was designed for two people for three days, with 10 sachets. If you find flowing water, you can use the 1 liter, or 33 ounces, Rino stainless steel water bottle to boil some water. Remove the cap and pour the water through a piece of cloth to filter out the big stuff into the bottle and heat until it boils for at least one minute depending on how much fuel you have, though two minutes is safer.

Pro Tip: Never drink unfiltered water. Flowing water will also always be safer than stagnant water. Green vegetation growing near the water’s edge is also a good sign. If feasible, digging a small hole near the edge of the water will allow water to flow through the sand or dirt and act as a filter. Or as you dig down and the water hole starts to fill with water, can help filter the water before you boil it. Boiling water is always the safest option.
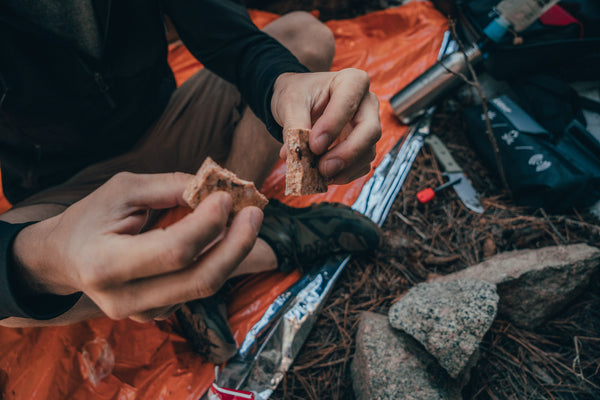
Included in the food pouch are two Datrex 2400Kcal Food Rations. They are kind of like biscuits, with lots of carbohydrates, and taste like a surgery biscuit. They will help keep your brain functioning and give you the energy to keep going, even if they won’t completely eliminate hunger.
Pro Tip: Wait at least 24 hours or more before opening the survival rations. You will get hungry but still have enough calories in your body to keep going. It’s also a good idea to try and save the food for when you will be doing a lot of work, like building a shelter or walking long distances, or when you need to make sure you’re thinking clearly.
If you are unable to boil the water, you can use the ten water purification tabs. As before, use a piece of cloth to filter out the big stuff, and put two tablets in the bottle. Loosely put the lid on and shake the bottle a little to splash some of the water out. This helps get some of the purifying agent onto the top part of the bottle you drink from, and then tighten the lid. Lightly shake the bottle for 10 minutes, then let it sit for 30 minutes. It’s crucial not to rush this process as even a little unpurified water can cause severe diarrhea.
In closing
Now you know the basics of your survival kit along with a few tips. There is always more to learn and you should never stop practicing. Even little things like taking the bag out every now and then and going over what’s inside. The more you practice and become familiar with your survival kit, the less time you will have to think of what’s inside or where something is when the time arises.
Over and out.
Leave a comment